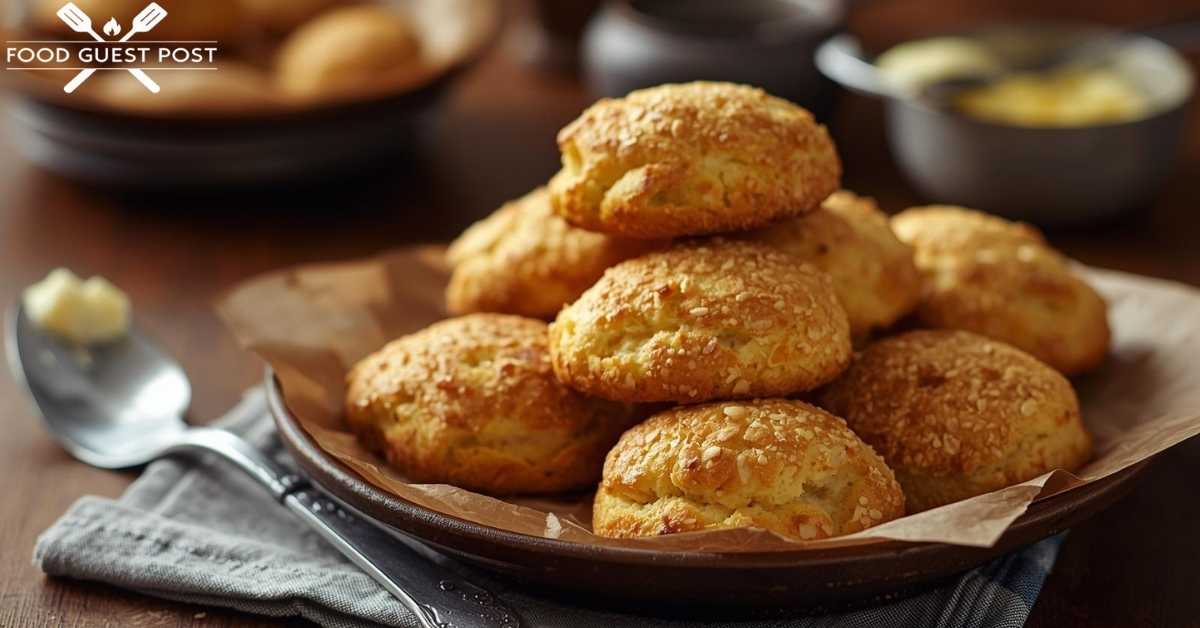
There’s something about warm, golden cheese scones fresh from the oven that just hits differently. You pull them apart, the steam rises, and that sharp cheddar smell fills your kitchen. Pure comfort. If you’ve been searching for a reliable, no-fuss recipe that actually works, you’re in the right place.
Mary Berry has been Britain’s baking queen for decades. Her cheese scone recipe is one of those classics that home bakers keep coming back to. Simple ingredients, straightforward method, and results that taste like they came from a proper bakery. Whether you’re making them for afternoon tea, a quick snack, or just because you fancy some warm savoury baking, this guide covers everything you need.
What are Mary Berry Cheese Scones?
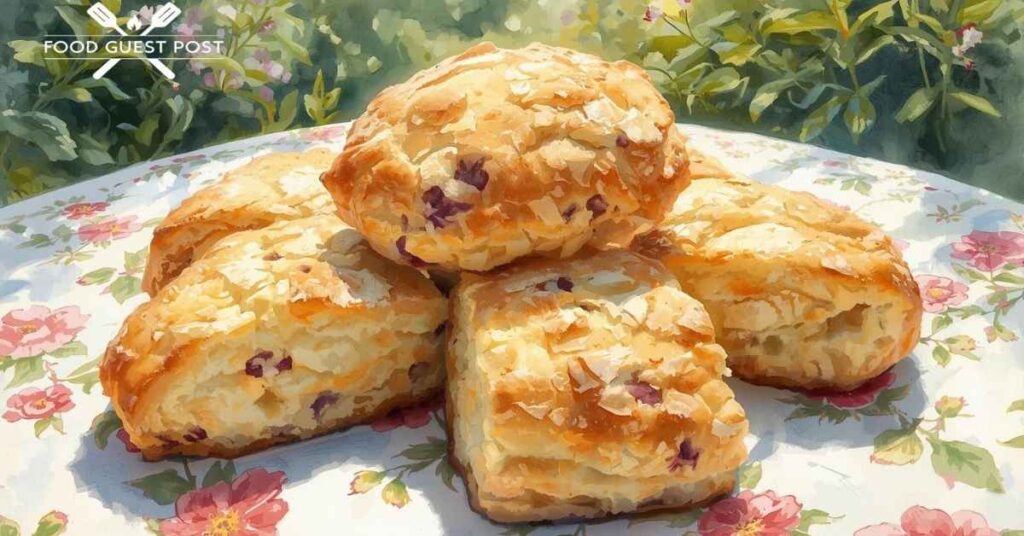
Mary Berry cheese scones are a classic savoury British bake. They’re soft, slightly flaky, cheesy through and through, and absolutely brilliant served warm with butter. Unlike sweet scones loaded with cream and jam, these are firmly in the savoury camp. Think of them as the more grounded, no-nonsense cousin at the tea table.
The recipe itself draws from traditional British scone-making. Mary Berry’s version keeps things uncomplicated. She uses strong cheddar, a light hand with the dough, and a hot oven. That’s really the whole secret. No fancy techniques. No obscure ingredients. Just good, honest baking done right.
These scones have earned their place as a staple in British baking culture. You’ll spot them at village fetes, bakery windows, and Sunday kitchen tables across the country.
Read More: Easy Mary Berry Coconut Tray Bake Recipe
Why This Recipe Is Worth Trying
You might be thinking, cheese scones are cheese scones. What makes this one special? Fair question. Here’s the honest answer.
Most cheese scone recipes either come out too dense, too dry, or somehow flavourless despite the cheese. Mary Berry’s method gets the balance right. The ratio of fat to flour keeps them tender. The egg adds richness without weighing them down. And using a strong, mature cheddar means every bite actually tastes of something.
It’s also a quick savoury baking recipe in the truest sense. From start to finish, you’re looking at around 30 minutes. No yeast. No proving. No waiting around. You mix, you shape, you bake. That’s it.
If you’re new to baking, this is genuinely one of the most beginner-friendly things you can make. If you’re an experienced baker, it’s one of those recipes you’ll reach for again and again because it simply works.
Essential Ingredients to Make Mary Berry Cheese Scones
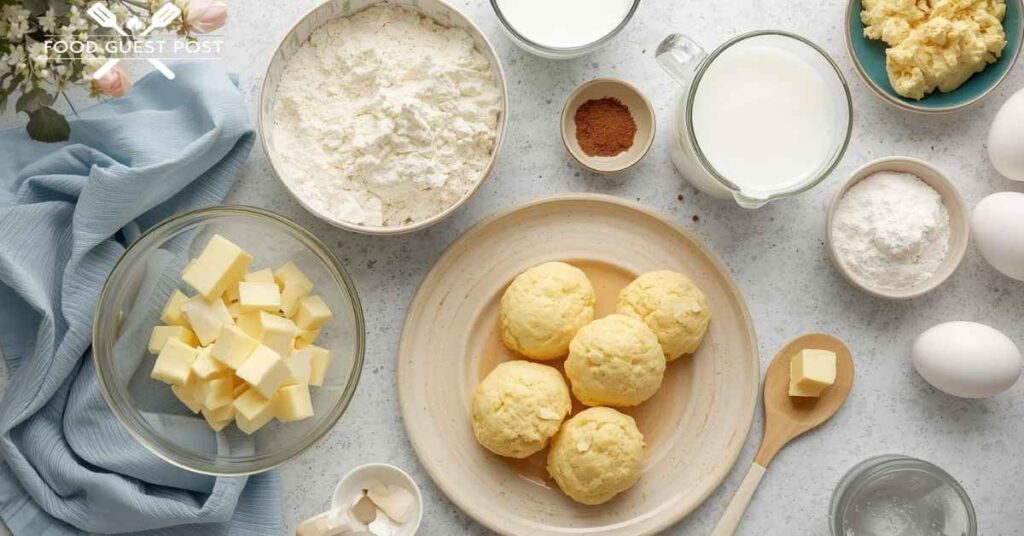
Getting your ingredients right is half the battle. Here’s what you’ll need and why each one matters.
Self-raising flour forms the base. It already contains raising agents, which saves you measuring baking powder separately. If you only have plain flour, add two teaspoons of baking powder per 225g.
Butter needs to be cold. This is non-negotiable. Cold butter creates steam as it bakes, which is what gives you those light, flaky layers. Don’t melt it. Don’t soften it. Keep it straight from the fridge.
Mature cheddar is the go-to for a proper cheddar cheese baking recipe. You want something with a sharp, pronounced flavour because a mild cheese will get lost. Grate it finely so it distributes evenly through the dough.
One egg adds structure and richness. It helps the scones hold together and gives them a slight golden colour on the inside.
Milk binds everything and keeps the texture soft. Whole milk works best. Some bakers use buttermilk for a slight tang and extra tenderness, and it’s worth trying if you have some.
Salt and a pinch of mustard powder round everything out. Mustard powder in particular is a quiet hero. You won’t taste it as mustard, but it amplifies the cheese flavour beautifully.
Quantities for 8 scones: 225g self-raising flour, 55g cold butter, 120g mature cheddar, 1 egg, 90ml milk, half a teaspoon of salt, half a teaspoon of mustard powder.
Handy Kitchen Tools for Best Results
You don’t need a fully kitted-out kitchen for this. But a few basics make the process much smoother.
A large mixing bowl gives you room to work the dough without flour flying everywhere. A pastry cutter or just your fingertips work for rubbing in the butter. A cheese grater, obviously. A rolling pin helps you get an even thickness, though some bakers prefer just pressing the dough out by hand. A round cutter, about 5cm, gives you that classic shape. A baking tray lined with parchment paper, and a cooling rack for after they come out of the oven.
One thing that genuinely makes a difference: use a sharp cutter. Press it straight down without twisting. Twisting seals the edges and stops the scones from rising properly.
Step-by-Step Guide to Making Mary Berry Cheese Scones
Step 1: Preheat the oven and prepare the tray
Set your oven to 220°C, or 200°C if you’re using a fan oven. Gas mark 7. Let it fully preheat before the scones go in. A hot oven is what makes them rise quickly and get that golden top. Line your baking tray with parchment paper and set it aside.
Step 2: Combine dry ingredients
Add your self-raising flour, salt, and mustard powder into a large mixing bowl. Give it a quick stir to combine. If you’re using plain flour, add the baking powder now too. This is the foundation of your savoury scone dough preparation, so take a moment to make sure everything is evenly mixed.
Step 3: Rub in the butter
Cut your cold butter into small cubes and drop them into the flour mixture. Using your fingertips, rub the butter into the flour by pinching and lifting until it resembles rough breadcrumbs. Work quickly so the butter stays cold. If your kitchen is warm, pop the bowl in the fridge for five minutes before continuing.
Step 4: Add cheese
Stir in most of your grated cheddar now, reserving a small handful to sprinkle on top before baking. Toss it through the flour mixture until it’s well distributed. You want cheese in every bite, not a clump in one corner.
Step 5: Add egg and milk
Beat the egg lightly and add it to the bowl along with most of the milk. Stir gently with a fork or round-bladed knife until a soft, slightly sticky dough forms. Add the remaining milk a little at a time if the dough looks too dry. Don’t overmix. The more you work the dough, the tougher your scones will be.
Step 6: Shape and cut the dough
Turn the dough out onto a lightly floured surface. Pat or roll it gently to about 2.5cm thick. Cut out rounds using your cutter, pressing straight down without twisting. Re-roll any scraps and cut again, though scones from the first cutting tend to rise the best.
Step 7: Add toppings and bake
Place your scones on the prepared tray, fairly close together. Brush the tops with a little milk or beaten egg for a golden finish. Sprinkle the reserved cheese on top. Slide the tray into the preheated oven and bake for 12 to 15 minutes until risen and golden brown on top.
Step 8: Cool and serve
Transfer to a cooling rack. Now here’s the hardest part: try to let them cool for at least five minutes before diving in. Serve warm with proper salted butter, or even a swipe of cream cheese if you’re feeling indulgent. These are warm cheese scones with butter at their finest.
What I Got Wrong (And How I Fixed It)
The first time I made these, they came out flat and a bit dense. Classic beginner mistake: I overworked the dough. After a few tries, I figured out where I’d gone wrong.
First, I wasn’t cutting the butter small enough, so it wasn’t distributing evenly. Second, I kept pressing and folding the dough because it looked rough and uneven. That’s actually fine. Scone dough is supposed to look a bit shaggy. Third, my oven wasn’t fully preheated, which meant the scones sat in a lukewarm oven for the first few minutes and never got that initial burst of heat they need to rise.
The fix was simple: smaller butter cubes, a lighter touch, and patience with the oven. Once I sorted those three things, the difference was dramatic. They came out tall, fluffy, and properly golden.
Healthier Version of Mary Berry’s Cheese Scones
Want to lighten things up a bit? It’s absolutely doable without sacrificing too much of what makes these great.
Swap half the self-raising flour for wholemeal self-raising flour. You’ll get a nuttier flavour and more fibre. The texture will be slightly denser, but in a wholesome rather than heavy way.
Reduce the butter to 40g instead of 55g. You’ll still get tenderness, just a touch less richness. Replacing full-fat cheddar with a reduced-fat version is another option, though the flavour does take a small hit. Using semi-skimmed milk instead of whole milk shaves a few calories too.
Adding a tablespoon of seeds, pumpkin, sesame, or sunflower, scattered through the dough adds nutritional value and a pleasant crunch. It also makes them look impressive with very little effort.
Ingredient Substitutions for Mary Berry Cheese Scones
Life happens. You’re halfway through and realise you’re out of something. Here’s what you can swap without ruining your bake.
No self-raising flour? Use plain flour plus two teaspoons of baking powder per 225g. It works just as well. No cheddar? A mature gruyere, red leicester, or even a smoked cheese can step in. Each gives a slightly different character to the scone. Gruyere in particular is a delicious choice for something a bit more sophisticated.
No egg? You can leave it out and just add a touch more milk. The scones will be slightly less rich but still very edible. Dairy-free? Use a plant-based butter and oat milk or almond milk. A vegan cheddar-style block works reasonably well here too.
Mustard powder gone missing from the cupboard? A tiny pinch of cayenne pepper or a half teaspoon of Worcestershire sauce stirred into the milk brings a similar warmth.
Pairing Ideas: What to Serve With Mary Berry Cheese Scones
These scones are genuinely versatile. They’re not just a tea time savoury scone situation.
Serve them warm alongside a bowl of soup, tomato, leek and potato, or butternut squash all work beautifully. The scone becomes a sort of rustic bread substitute and the combo is seriously satisfying.
For afternoon tea, pile them on a tiered stand next to sandwiches and sweet treats. They hold their own perfectly well in that setting. Add a pot of chutney on the side, a good mango or caramelised onion variety, and you’ve elevated the whole experience.
They also work wonderfully as a savoury snack with a small bowl of cream cheese and sliced spring onions, or topped with smoked salmon and a squeeze of lemon. If you’ve got a brunch crowd coming, these are a brilliant option alongside scrambled eggs.
Expert Tips to Make Perfect Mary Berry Cheese Scones
A few things can make or break your batch. Keep these in mind every time.
Use the freshest self-raising flour you can. Old flour loses its raising power and your scones won’t rise as well. Check the date on the packet.
Don’t skip the mustard powder. As mentioned earlier, it doesn’t add a mustard flavour. It adds depth to the cheese. It’s a small thing that makes a real difference.
Grate your cheese finely. Coarsely grated cheese can create uneven pockets and affect the texture of the dough. Fine grating distributes the flavour more evenly.
Don’t overhandle the dough. Say it with me: less is more. The gluten in flour tightens up when you work it, leading to tough, chewy scones instead of light, crumbly ones.
Get your oven properly hot before the tray goes in. 220°C is not a suggestion. That heat is what makes them spring up quickly.
And finally, eat them the same day if you can. Cheese scones for afternoon tea are at their peak within a few hours of baking. After that, they start to lose their magic.
Creative Ways to Customize Mary Berry Cheese Scones
Once you’ve nailed the base recipe, have fun with it. There’s plenty of room to make it your own.
Add finely chopped chives or spring onions into the dough for a mild onion flavour that pairs brilliantly with cheddar. A teaspoon of dried herbs, thyme, rosemary, or even za’atar, adds an aromatic twist.
Try mixing in crumbled cooked bacon or small cubes of pancetta for a more indulgent, hearty version. These are brilliant served warm for a weekend brunch.
Experiment with cheese combinations. Half cheddar and half parmesan gives a sharper, saltier scone. Half cheddar and half gruyere is rich and slightly nutty. A blue cheese like stilton is bold but works surprisingly well if you’re into that kind of flavour.
For a bit of heat, a small amount of finely diced fresh chilli or a pinch of smoked paprika stirred into the flour adds a gentle kick that keeps things interesting.
Storing Mary Berry Cheese Scones the Right Way
Let’s be honest, if you’re baking a full batch, you probably won’t eat all eight in one sitting. So here’s how to keep them.
Once completely cooled, store them in an airtight container at room temperature. They’ll stay fresh for up to two days. After that, they start to dry out and lose their soft texture.
For longer storage, freezing is your best option. Wrap each scone individually in cling film, then place them all in a freezer bag. They’ll keep well for up to three months. Label the bag with the date so you’re not playing guessing games six weeks later.
You can also freeze them unbaked. Cut out the raw scone rounds, place them on a tray to freeze individually first, then transfer to a bag. Bake from frozen at 220°C for about 18 to 20 minutes. This is genuinely one of the most useful baking tricks out there.
How to Reheat Mary Berry Cheese Scones (If Needed)
Reheating scones well is an underrated skill. Done badly, they turn rubbery or dry. Done right, they taste almost as good as fresh.
The oven is your best friend here. Wrap the scones loosely in foil and heat at 180°C for about 8 to 10 minutes. They warm through evenly and the outside stays slightly crisp.
The microwave is quicker but trickier. Wrap the scone in a slightly damp piece of kitchen paper and heat in 15-second bursts. This stops it drying out. Don’t overdo it or you’ll end up with a sad, rubbery hockey puck.
If they’re slightly stale, slice them in half and toast them cut-side down in a dry pan over a medium heat for a minute or two. The cheese crisps up a little on the surface and honestly, it’s delicious in a different way to the original.
Nutritional Breakdown (per scone)
This is based on a batch of 8 scones using the ingredient quantities listed earlier.
Calories: approximately 210 to 230 kcal. Protein: around 7g, mainly from the cheese and egg. Carbohydrates: approximately 22g. Fat: around 11g, with a good portion coming from the cheese and butter. Fibre: roughly 1g, slightly higher if you use wholemeal flour. Sodium: moderate, depending on how salty your cheese and butter are.
These aren’t diet food, but they’re not outrageous either. Two scones and a bowl of soup is a proper, satisfying meal without going overboard.
Mary Berry Cheese Scones
Ingredients
225g self-raising flour, 55g cold butter (cubed), 120g mature cheddar (grated, plus extra for topping), 1 medium egg, 90ml whole milk (plus a little extra for brushing), half a teaspoon of salt, half a teaspoon of mustard powder.
Instructions
Preheat your oven to 220°C (200°C fan, gas mark 7) and line a baking tray with parchment paper.
In a large bowl, combine the flour, salt, and mustard powder. Add the cold butter cubes and rub them into the flour with your fingertips until the mix looks like rough breadcrumbs.
Stir in most of the grated cheddar. Beat the egg and add it to the bowl with most of the milk. Mix gently until a soft dough forms. Add a splash more milk if the dough is too dry.
Turn out onto a floured surface and pat to about 2.5cm thick. Cut out rounds using a 5cm cutter, pressing straight down. Place on the tray, brush tops with milk, and sprinkle with the reserved cheese.
Bake for 12 to 15 minutes until golden and well risen. Cool on a rack for a few minutes, then serve warm with butter.
FAQ’s
What cheese is best for Mary Berry cheese scones?
Mature or extra mature cheddar gives the strongest flavour and works best in this recipe. Gruyere and red leicester are also excellent choices.
Why are my cheese scones coming out dense?
Usually this comes down to overworking the dough or cold oven temperatures. Handle the dough as little as possible and always preheat your oven fully before baking.
Can you freeze cheese scones?
Yes, they freeze really well. Cool them completely, wrap individually, and freeze for up to three months. Reheat in the oven at 180°C for best results.
How long do homemade cheese scones last?
At room temperature in an airtight container, they’re best within two days. After that, freeze them for longer storage.
What do you serve with cheese scones?
They’re brilliant with salted butter, cream cheese, chutney, or alongside a bowl of soup. For something more special, try them with smoked salmon or soft cheese and herbs.

Logan Reid is a food content strategist passionate about digital storytelling and SEO growth. With years of culinary and marketing experience, he helps food bloggers and brands boost visibility through authentic, data-driven strategies. His work blends creativity, expertise, and trust, making every collaboration a recipe for lasting online success.