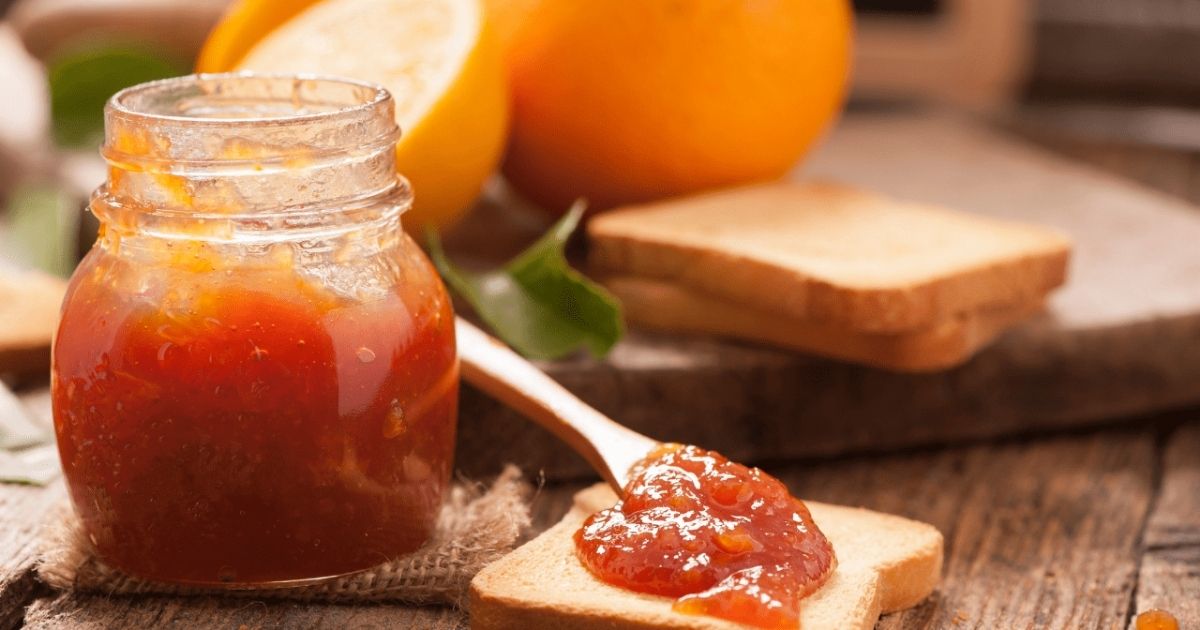
There’s something quietly magical about a jar of homemade marmalade sitting on your kitchen shelf. That deep amber glow. The sharp, bittersweet scent of citrus that fills your whole kitchen. It feels old-fashioned in the best possible way. And when you follow the Mary Berry marmalade recipe, you’re not just making jam. You’re carrying on a tradition that’s been warming British breakfast tables for generations.
Maybe you’ve tried shop-bought marmalade and found it too sweet, too thin, or just lacking that real citrus punch. Or maybe you’ve always wanted to make your own preserve but felt intimidated by the whole process. Setting points, muslin bags, sterilising jars… it can all sound a bit technical. But here’s the thing: it really isn’t. Once you understand the rhythm of it, marmalade-making is one of the most satisfying things you can do in a kitchen.
What Is Mary Berry Marmalade?
Mary Berry is one of Britain’s most trusted and beloved home cooks. She’s been teaching people how to bake and preserve for decades, and her approach has always been the same: keep it simple, use good ingredients, and don’t overcomplicate things. Her marmalade recipe reflects that philosophy perfectly.
At its core, Mary Berry marmalade is a traditional British marmalade made with Seville oranges, lemons, and sugar. It’s got that classic bittersweet orange spread quality that pairs beautifully with toast, scones, or even a good wedge of cheese. The peel is soft, the set is firm but not rubbery, and the flavour has depth that you simply cannot buy in a supermarket.
What makes it stand out from other homemade orange marmalade recipes is the balance. It’s not cloyingly sweet. It’s not aggressively bitter. It sits right in that sweet spot, which is honestly where all good preserves should live.
Read More: Easy Mary Berry Yorkshire Pudding Recipe for 4 – Light, Airy & Crispy
Why This Recipe Is Worth Trying
Let’s be real. You could grab a jar of marmalade for a couple of pounds at any supermarket. So why spend an afternoon making your own? Because the difference is extraordinary, that’s why.
When you make a citrus fruit jam from scratch, you control every element. The thickness of the peel. The sweetness level. The texture of the set. There are no preservatives, no artificial colours, and no mystery ingredients. Just fruit, sugar, and a little patience. Homemade jam without additives tastes cleaner, brighter, and more alive than anything from a shelf.
There’s also the satisfaction factor. Something about standing over a bubbling pot of citrus and sugar feels deeply rewarding. And when you hand someone a jar you made yourself? That’s a proper gift. Far more personal than anything wrapped in cellophane.
Plus, this recipe has a long shelf life preserve quality when stored correctly. We’re talking up to a year in a cool, dark cupboard. That’s brilliant value for the effort involved.
Essential Ingredients to Make Mary Berry Marmalade
Getting the ingredients right is half the battle. Here’s what you’ll need for a standard batch.
Seville oranges are the traditional choice. They’re intensely aromatic, high in natural pectin from citrus, and have that signature bitter edge that defines proper marmalade. You’ll need around 1 kg of them. Seville oranges have a short season, typically January to February, so keep an eye out and stock up when they appear.
You’ll also need one or two lemons. Lemon juice adds brightness and extra pectin, which helps the marmalade set properly. Don’t skip this, even if it seems like a small addition. It genuinely makes a difference to both flavour and texture.
Sugar is the other main player. The sugar ratio for marmalade matters quite a bit. Use granulated or preserving sugar, and make sure you’re working with roughly the same weight of sugar as your softened fruit and liquid. Preserving sugar gives a clearer finish, which is great if you’re going for that glossy citrus preserve look.
Water rounds out the ingredient list. You’ll use it in the initial simmering stage to soften the peel and extract the pectin before you ever get near the sugar.
Handy Kitchen Tools for Best Results
You don’t need a professional kitchen to pull this off. But a few specific tools will make your life considerably easier.
A large, heavy-bottomed preserving pan is ideal. The wide base encourages faster evaporation and helps you hit that rolling boil you need for setting. If you don’t have one, a large stockpot works fine, just keep an eye on things more carefully.
A jam thermometer is genuinely helpful. The marmalade setting point is 105 degrees Celsius, and knowing when you’ve hit it removes all the guesswork. You can get a reliable one for just a few pounds, and it’s useful for every jam or preserve you’ll ever make.
Muslin cloth or a proper muslin bag for marmalade is essential for collecting the pips and pith. This is where a huge amount of the pectin lives, and you need that pectin to get a good set. Tie the pips up in a small square of muslin and simmer them right alongside the fruit.
Sterilised jars are non-negotiable. Knowing how to sterilise jam jars properly is one of those small skills that protects your whole batch. You can do this by washing them in hot soapy water, rinsing well, then placing them in an oven at 140 degrees Celsius for around 15 minutes. Easy.
A wide-necked funnel and a ladle make jarring the marmalade much less messy. A sharp knife and a solid chopping board are obvious, but worth mentioning. And a plate in the freezer for the cold plate test for jam, which we’ll cover in the steps.
Step-by-Step Instructions to Prepare Mary Berry Marmalade
This is where the real fun starts. Follow these steps carefully and you’ll end up with a beautiful batch every single time.
Step 1: Prepare the citrus
Wash your Seville oranges and lemons thoroughly. Cut them in half and squeeze out all the juice, saving it in a large bowl. Then slice the peel. This is where you make a choice. Do you want thick cut orange peel marmalade or something finer and more delicate? Either works. Just be consistent with your cuts so the peel cooks evenly. Remove any particularly thick bits of white pith if you want to reduce bitterness in marmalade, as the pith carries most of that intensity.
Step 2: Collect the pips
As you cut and juice your fruit, collect all the pips, the membrane, and any extra pith you’ve removed. Place these onto a large square of muslin cloth and tie it into a neat bag. This little bundle is your natural pectin powerhouse, and it’s going to sit in the pot with the fruit throughout the simmering process.
Step 3: Simmer the fruit
Place the sliced peel, the squeezed juice, and the muslin bag into your preserving pan. Add approximately 2.5 litres of water. Bring everything to a gentle boil, then reduce the heat and let it simmer for around two hours. You’re aiming to soften the peel until it’s completely tender and you can squish a piece easily between your fingers. This marmalade simmering process also extracts all that natural pectin from citrus into the liquid, which is what makes it set.
Step 4: Remove the muslin bag
Once the peel is fully soft, lift out the muslin bag. It will be very hot, so use a spoon to press it against the side of the pan and squeeze out as much of that pectin-rich liquid as possible before discarding the bag. Don’t rush this. That liquid is gold.
Step 5: Add the sugar
Now measure your fruit mixture. For every 500 ml of liquid and peel, you’ll add roughly 400 to 450 grams of sugar. Pour the sugar into the pan and stir over a low heat until it has completely dissolved. Do not let the mixture boil until every last grain of sugar has gone. If you rush this stage, you risk a grainy or cloudy marmalade rather than that beautiful clear glossy marmalade you’re after.
Step 6: Boil to the setting point
Once the sugar is dissolved, turn up the heat and bring the marmalade to a rapid rolling boil. This is the stage that determines your final set. Keep a close eye on the temperature using your jam thermometer. You’re looking for 105 degrees Celsius. This is how to thicken marmalade properly. It should take somewhere between 10 to 20 minutes of hard boiling, though it varies depending on your pan and the pectin content of your fruit.
Start testing after about 10 minutes using the cold plate test for jam. Drop a small spoonful onto your chilled plate, wait 30 seconds, then push it gently with your finger. If it wrinkles and holds its shape, you’ve hit the setting point. If it’s still runny, keep boiling and test again every few minutes.
Step 7: Cool slightly
Once you’ve hit the setting point, take the pan off the heat and leave it to cool for about 10 to 15 minutes. This is a small but important step. It allows the marmalade to thicken slightly so that when you jar it, the peel distributes evenly throughout rather than floating to the top. This is the trick for how to prevent peel floating, and it works beautifully.
Step 8: Jar the marmalade
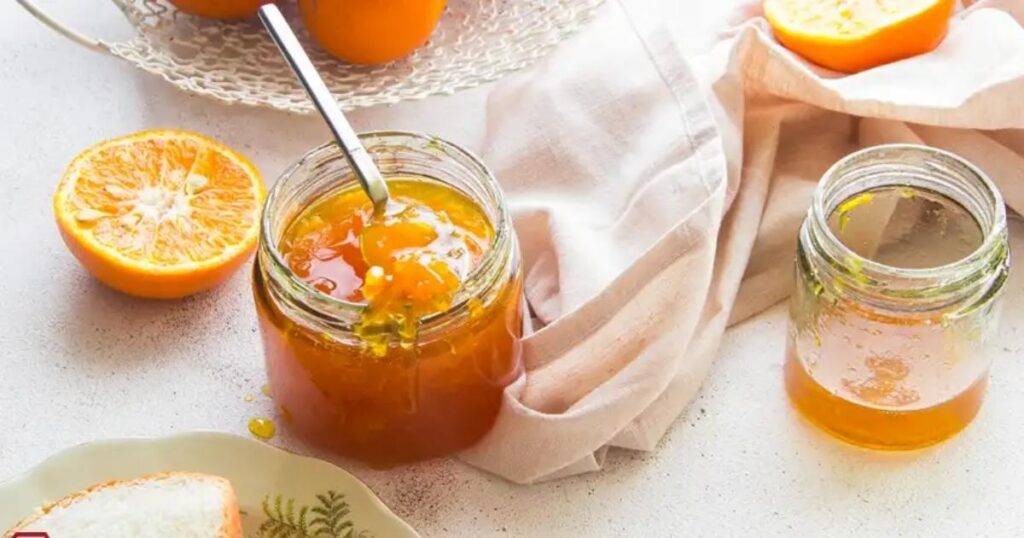
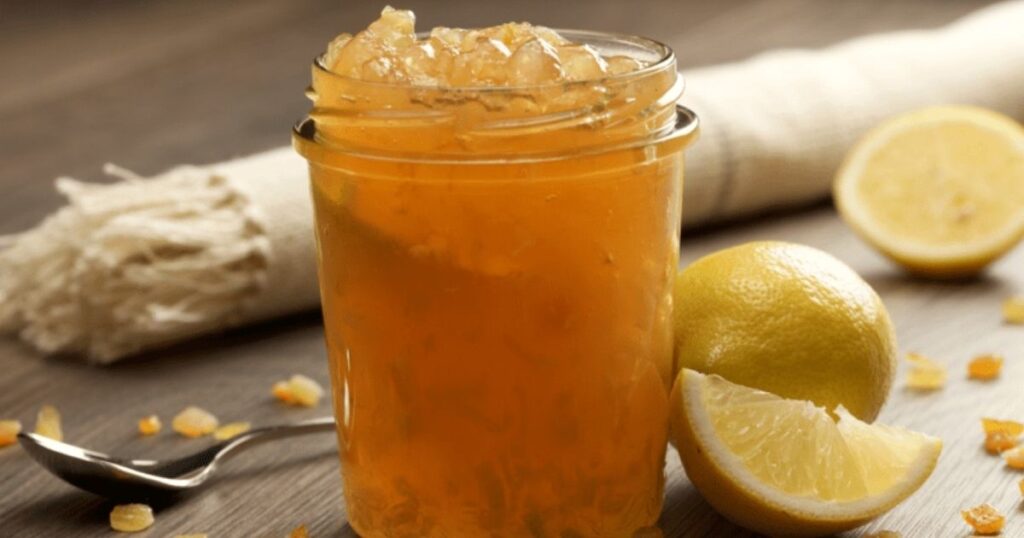
Ladle your marmalade into your sterilised jars while it’s still warm. Fill them right to the top, then seal immediately with lids. As the marmalade cools, it creates a natural vacuum seal. Label your jars with the date and contents. Leave them on a flat surface to cool completely before moving them to storage. And there you have it. A batch of genuine, homemade citrus preserve recipe British style.
What I Got Wrong (And How I Fixed It)
Honestly? The first time I made marmalade, it didn’t set. At all. I had a very expensive, very orange syrup. It was delicious on pancakes, but it wasn’t marmalade.
Here’s what went wrong. I didn’t let the peel simmer long enough. The peel wasn’t fully soft before I added the sugar. Once you add sugar, the peel stops softening. So if you rush that stage, you end up with tough peel and insufficient pectin extraction. Both problems at once.
The fix is simple. Never rush the simmer. Two hours feels like a long time. It isn’t. Be patient. Also, make sure your muslin bag is properly filled and that you squeeze every drop from it before discarding. That step alone can be the difference between a set and a syrup.
I also once skipped the brief resting period before jarring and ended up with all the peel floating at the top of every single jar. Ten minutes of patience would have saved the whole batch. Now I never skip it.
If you’re wondering why marmalade does not set even after doing everything right, check your pectin levels. Out-of-season oranges have less pectin. Adding an extra lemon, or even a splash of lemon juice, usually sorts it out.
Healthier Version of Mary Berry Marmalade
Traditional marmalade is naturally high in sugar, and that’s simply part of how preserves work. The sugar isn’t just for sweetness. It’s what preserves the fruit and enables the set. But there are ways to make a slightly lighter version if that matters to you.
You can reduce the sugar by around 20 percent and still achieve a soft set marmalade recipe rather than a firm one. It won’t have quite the same shelf stability, so store it in the fridge and use it within a few weeks rather than months.
Some people add a little raw honey in place of part of the sugar for a different flavour profile. It changes the taste noticeably, adding a floral sweetness that works well with the bitter citrus. Just be aware that honey-based marmalades can be trickier to set.
Using the whole fruit, peel, pith, and all, means you’re retaining more of the fibre and natural compounds from the citrus. That’s a genuine nutritional benefit compared to stripped-down commercial versions. The marmalade nutritional value per tablespoon is modest but includes small amounts of vitamin C and dietary fibre, which is more than you’d expect from a sweet preserve.
Ingredient Substitutions for Mary Berry Marmalade
Seville oranges aren’t always easy to find outside of their very brief winter season. If you can’t get them, you can use regular navel oranges combined with a good squeeze of grapefruit juice to replicate some of that bitter complexity. It won’t be identical, but it’s a perfectly respectable Seville oranges substitute.
Blood oranges make a stunning alternative if you want something a little different. The colour alone is extraordinary, and the flavour is subtly different, slightly less bitter, slightly more berry-like.
If you’re cutting back on refined sugar, coconut sugar can work, though it will darken the marmalade considerably and change the flavour. Jam sugar, which contains added pectin, is another solid option if your oranges are low in natural pectin.
Lemon juice is pretty much non-negotiable for setting, but lime juice can do a similar job and adds an interesting tropical edge to the flavour. It’s a small change but a noticeable one.
Pairing Ideas: What to Serve With Mary Berry Marmalade
Marmalade on hot, buttered toast is the classic breakfast spread for a reason. Simple. Brilliant. Timeless. But there are so many other ways to enjoy it that people often overlook.
Spread it generously onto a warm scone alongside clotted cream for an elevated afternoon tea experience. The bittersweet orange cuts beautifully through the richness of the cream. It’s genuinely one of life’s small pleasures.
Marmalade for baking is enormously underrated. Swirl it through a sponge batter before baking for a citrus-laced traybake. Use it as a glaze for roasted chicken or duck for something savoury and complex. Stir it into a vinaigrette for a salad dressing with real character.
It pairs surprisingly well with strong cheese too. A sharp cheddar with a spoonful of marmalade on a cracker is a combination that deserves far more attention than it typically gets.
Expert Tips to Make Perfect Mary Berry Marmalade
A few seasoned insights that make a real difference.
Always start with room-temperature fruit. Cold fruit from the fridge takes longer to release its juice and pectin, which can affect the final result. Leave your oranges out overnight before you start.
The cold plate test is more reliable than colour or smell. Keep two or three plates in your freezer from the very beginning of the process so they’re thoroughly chilled when you need them. A plate that’s only slightly cold won’t give you an accurate reading.
Don’t stir the marmalade once it’s at a rolling boil. Stirring drops the temperature and disrupts the setting process. Just leave it and let it do its thing.
If you see a grey or cloudy foam forming on the surface during boiling, skim it off with a spoon. A small knob of butter stirred in at the end can help clear any residual foam and gives the marmalade a subtle glossiness. This is a classic trick that many home preservers swear by.
Warm your sugar in a low oven before adding it to the pan. Warm sugar dissolves faster and more evenly, which reduces your risk of crystallisation and keeps the marmalade looking clear.
Creative Ways to Customise Mary Berry Marmalade
Once you’ve nailed the basic recipe, start experimenting. That’s where it gets really fun.
Add a cinnamon stick or a few cardamom pods during the simmering stage for a warmly spiced winter marmalade. Remove them before you add the sugar. The result is subtle but intriguing.
A splash of whisky or brandy stirred in just before jarring adds an adults-only warmth that works especially well in a small batch marmalade gifted at Christmas. Use about two tablespoons per kilogram of finished marmalade.
Ginger is another brilliant addition. Fresh grated ginger stirred in near the end of cooking adds a fiery, aromatic note that pairs wonderfully with orange. Or use crystallised ginger pieces for little pockets of intense flavour throughout.
Vanilla bean, chilli flakes, or even a little lavender can all make interesting additions if you want to push things in a more artisan direction. Start with small quantities and taste as you go. Marmalade is forgiving that way.
How to Store Leftover Mary Berry Marmalade
Properly jarred marmalade can last up to 12 months in a cool, dark cupboard. The key is the seal. If your jars sealed correctly when cooling, you’ll see a slight indentation in the centre of each lid. That’s your sign that the vacuum seal is intact.
Once opened, store the jar in the fridge and use within four to six weeks. It won’t go off dramatically after that, but the flavour starts to dull and the colour can darken.
If you notice any mould on a sealed jar, don’t just scrape it off. Discard the whole jar. It’s rare if your sterilisation was done properly, but it’s not worth the risk.
Storing homemade marmalade in a cool pantry, away from direct sunlight, will keep it at its best. Heat and light degrade both the colour and the pectin structure over time.
How to Reheat Mary Berry Marmalade
If your marmalade has set more firmly than you’d like after opening, gently warming it loosens it beautifully. Spoon the amount you need into a small saucepan and warm over very low heat, stirring gently. It should soften in just a few minutes.
You can also do this in a microwave in short 10-second bursts, stirring between each one. Don’t overheat it, though. Too much heat can break down the set and leave you with a syrupy texture that won’t firm up again when it cools.
If you want to use marmalade as a glaze or sauce, warming it first is the best approach regardless. A warmed marmalade glaze brushed over a tart or cake gives a beautiful professional sheen that looks far more impressive than it is to achieve.
Nutritional Value (per tablespoon)
Marmalade is a preserve, and like all preserves, it’s primarily a source of sugar. Here’s an approximate breakdown per tablespoon, which is around 20 grams.
Calories: 49 kcal. Total carbohydrates: 13 grams, almost all from sugars. Fat: 0 grams. Protein: 0 grams. Dietary fibre: 0.1 grams. Vitamin C: a small but present amount, derived from the citrus. Sodium: trace levels only.
The marmalade nutritional value is best understood as a condiment rather than a health food. A little goes a long way, and used mindfully as a breakfast spread or flavouring ingredient, it fits comfortably into a balanced diet.
Mary Berry Marmalade Recipe
Ingredients
- 1 kg Seville oranges
- 2 lemons (juice only)
- 2.5 litres water
- 1.5 kg granulated or preserving sugar
- A square of muslin cloth for the pips
Instructions
Wash all the fruit thoroughly. Cut the oranges and lemons in half and squeeze the juice into a large preserving pan. Collect all the pips, membrane, and excess pith onto a piece of muslin cloth, gather it up, and tie it securely into a bag. Slice the peel to your preferred thickness and add it to the pan along with the muslin bag and the water.
Bring to a boil, then reduce to a steady simmer. Cook for around two hours until the peel is completely tender. Remove the muslin bag, pressing firmly to extract every bit of liquid. Measure the contents of the pan and add the appropriate amount of sugar, approximately 400 to 450 grams per 500 ml of liquid.
Stir over low heat until the sugar dissolves completely. Then bring to a rapid rolling boil. Use a jam thermometer to monitor the temperature, aiming for 105 degrees Celsius. Begin the cold plate test after 10 minutes of hard boiling. Once the setting point is confirmed, remove from heat. Allow the marmalade to rest for 10 to 15 minutes. Ladle into sterilised jars, seal immediately, and leave to cool completely.
Final Words
The Mary Berry marmalade recipe isn’t just a recipe. It’s an invitation to slow down, get your hands a little sticky, and make something genuinely worthwhile from scratch. It connects you to a long tradition of British pantry staples, and once you’ve made it, shop-bought versions will genuinely never feel the same again.
The process takes time. No getting around that. But most of that time is hands-off, just the fruit gently simmering away while you get on with your day. The active work is perhaps an hour, spread across an afternoon. And what you get at the end is jars of something real, something you made, something that will sit on your shelf and make every breakfast a little bit better for months to come.
FAQ’s
What is the best orange to use for marmalade?
Seville oranges are the traditional and most flavourful choice. Their high pectin content and bitter edge make them ideal for marmalade. If unavailable, a mix of navel oranges and grapefruit juice works as a reasonable substitute.
Why has my marmalade not set?
The most common reasons are insufficient pectin, undercooking, or not reaching 105 degrees Celsius. Adding extra lemon juice and returning the marmalade to the heat for another boil usually resolves the issue.
Can I reduce the sugar in this recipe?
You can reduce it by up to 20 percent for a softer set, but the shelf life will shorten significantly. Refrigerate and use within a few weeks rather than months.
How long does homemade marmalade last?
When properly jarred and sealed, homemade marmalade lasts up to 12 months in a cool, dark cupboard. Once opened, refrigerate and use within four to six weeks.
Can I use marmalade in cooking and baking?
Absolutely. Marmalade works brilliantly as a glaze for meats, stirred into cake batters, used in salad dressings, or spread between cake layers. Its bittersweet complexity adds depth to both sweet and savoury dishes.

Logan Reid is a food content strategist passionate about digital storytelling and SEO growth. With years of culinary and marketing experience, he helps food bloggers and brands boost visibility through authentic, data-driven strategies. His work blends creativity, expertise, and trust, making every collaboration a recipe for lasting online success.